Interacting with an articulation#
This tutorial shows how to interact with an articulated robot in the simulation. It is a continuation of the Interacting with a rigid object tutorial, where we learned how to interact with a rigid object. On top of setting the root state, we will see how to set the joint state and apply commands to the articulated robot.
The Code#
The tutorial corresponds to the run_articulation.py script in the scripts/tutorials/01_assets
directory.
Code for run_articulation.py
  1# Copyright (c) 2022-2026, The Isaac Lab Project Developers (https://github.com/isaac-sim/IsaacLab/blob/main/CONTRIBUTORS.md).
  2# All rights reserved.
  3#
  4# SPDX-License-Identifier: BSD-3-Clause
  5
  6"""This script demonstrates how to spawn a cart-pole and interact with it.
  7
  8.. code-block:: bash
  9
 10    # Usage
 11    ./isaaclab.sh -p scripts/tutorials/01_assets/run_articulation.py
 12
 13"""
 14
 15"""Launch Isaac Sim Simulator first."""
 16
 17
 18import argparse
 19
 20from isaaclab.app import AppLauncher
 21
 22# add argparse arguments
 23parser = argparse.ArgumentParser(description="Tutorial on spawning and interacting with an articulation.")
 24# append AppLauncher cli args
 25AppLauncher.add_app_launcher_args(parser)
 26# parse the arguments
 27args_cli = parser.parse_args()
 28
 29# launch omniverse app
 30app_launcher = AppLauncher(args_cli)
 31simulation_app = app_launcher.app
 32
 33"""Rest everything follows."""
 34
 35import torch
 36
 37import isaaclab.sim as sim_utils
 38from isaaclab.assets import Articulation
 39from isaaclab.sim import SimulationContext
 40
 41##
 42# Pre-defined configs
 43##
 44from isaaclab_assets import CARTPOLE_CFG  # isort:skip
 45
 46
 47def design_scene() -> tuple[dict, list[list[float]]]:
 48    """Designs the scene."""
 49    # Ground-plane
 50    cfg = sim_utils.GroundPlaneCfg()
 51    cfg.func("/World/defaultGroundPlane", cfg)
 52    # Lights
 53    cfg = sim_utils.DomeLightCfg(intensity=3000.0, color=(0.75, 0.75, 0.75))
 54    cfg.func("/World/Light", cfg)
 55
 56    # Create separate groups called "Origin1", "Origin2"
 57    # Each group will have a robot in it
 58    origins = [[0.0, 0.0, 0.0], [-1.0, 0.0, 0.0]]
 59    # Origin 1
 60    sim_utils.create_prim("/World/Origin1", "Xform", translation=origins[0])
 61    # Origin 2
 62    sim_utils.create_prim("/World/Origin2", "Xform", translation=origins[1])
 63
 64    # Articulation
 65    cartpole_cfg = CARTPOLE_CFG.copy()
 66    cartpole_cfg.prim_path = "/World/Origin.*/Robot"
 67    cartpole = Articulation(cfg=cartpole_cfg)
 68
 69    # return the scene information
 70    scene_entities = {"cartpole": cartpole}
 71    return scene_entities, origins
 72
 73
 74def run_simulator(sim: sim_utils.SimulationContext, entities: dict[str, Articulation], origins: torch.Tensor):
 75    """Runs the simulation loop."""
 76    # Extract scene entities
 77    # note: we only do this here for readability. In general, it is better to access the entities directly from
 78    #   the dictionary. This dictionary is replaced by the InteractiveScene class in the next tutorial.
 79    robot = entities["cartpole"]
 80    # Define simulation stepping
 81    sim_dt = sim.get_physics_dt()
 82    count = 0
 83    # Simulation loop
 84    while simulation_app.is_running():
 85        # Reset
 86        if count % 500 == 0:
 87            # reset counter
 88            count = 0
 89            # reset the scene entities
 90            # root state
 91            # we offset the root state by the origin since the states are written in simulation world frame
 92            # if this is not done, then the robots will be spawned at the (0, 0, 0) of the simulation world
 93            root_pose = robot.data.default_root_pose.torch.clone()
 94            root_pose[:, :3] += origins
 95            robot.write_root_pose_to_sim_index(root_pose=root_pose)
 96            root_vel = robot.data.default_root_vel.torch.clone()
 97            robot.write_root_velocity_to_sim_index(root_velocity=root_vel)
 98            # set joint positions with some noise
 99            joint_pos, joint_vel = (
100                robot.data.default_joint_pos.torch.clone(),
101                robot.data.default_joint_vel.torch.clone(),
102            )
103            joint_pos += torch.rand_like(joint_pos) * 0.1
104            robot.write_joint_position_to_sim_index(position=joint_pos)
105            robot.write_joint_velocity_to_sim_index(velocity=joint_vel)
106            # clear internal buffers
107            robot.reset()
108            print("[INFO]: Resetting robot state...")
109        # Apply random action
110        # -- generate random joint efforts
111        efforts = torch.randn_like(robot.data.joint_pos.torch) * 5.0
112        # -- apply action to the robot
113        robot.set_joint_effort_target_index(target=efforts)
114        # -- write data to sim
115        robot.write_data_to_sim()
116        # Perform step
117        sim.step()
118        # Increment counter
119        count += 1
120        # Update buffers
121        robot.update(sim_dt)
122
123
124def main():
125    """Main function."""
126    # Load kit helper
127    sim_cfg = sim_utils.SimulationCfg(device=args_cli.device)
128    sim = SimulationContext(sim_cfg)
129    # Set main camera
130    sim.set_camera_view([2.5, 0.0, 4.0], [0.0, 0.0, 2.0])
131    # Design scene
132    scene_entities, scene_origins = design_scene()
133    scene_origins = torch.tensor(scene_origins, device=sim.device)
134    # Play the simulator
135    sim.reset()
136    # Now we are ready!
137    print("[INFO]: Setup complete...")
138    # Run the simulator
139    run_simulator(sim, scene_entities, scene_origins)
140
141
142if __name__ == "__main__":
143    # run the main function
144    main()
145    # close sim app
146    simulation_app.close()
The Code Explained#
Designing the scene#
Similar to the previous tutorial, we populate the scene with a ground plane and a distant light. Instead of spawning rigid objects, we now spawn a cart-pole articulation from its USD file. The cart-pole is a simple robot consisting of a cart and a pole attached to it. The cart is free to move along the x-axis, and the pole is free to rotate about the cart. The USD file for the cart-pole contains the robot’s geometry, joints, and other physical properties.
For the cart-pole, we use its pre-defined configuration object, which is an instance of the
assets.ArticulationCfg class. This class contains information about the articulation’s spawning strategy,
default initial state, actuator models for different joints, and other meta-information. A deeper-dive into how to
create this configuration object is provided in the Writing an Asset Configuration tutorial.
As seen in the previous tutorial, we can spawn the articulation into the scene in a similar fashion by creating
an instance of the assets.Articulation class by passing the configuration object to its constructor.
    # Create separate groups called "Origin1", "Origin2"
    # Each group will have a robot in it
    origins = [[0.0, 0.0, 0.0], [-1.0, 0.0, 0.0]]
    # Origin 1
    sim_utils.create_prim("/World/Origin1", "Xform", translation=origins[0])
    # Origin 2
    sim_utils.create_prim("/World/Origin2", "Xform", translation=origins[1])

    # Articulation
    cartpole_cfg = CARTPOLE_CFG.copy()
    cartpole_cfg.prim_path = "/World/Origin.*/Robot"
    cartpole = Articulation(cfg=cartpole_cfg)
Running the simulation loop#
Continuing from the previous tutorial, we reset the simulation at regular intervals, set commands to the articulation, step the simulation, and update the articulation’s internal buffers.
Resetting the simulation#
Similar to a rigid object, an articulation also has a root state. This state corresponds to the root body in the articulation tree. On top of the root state, an articulation also has joint states. These states correspond to the joint positions and velocities.
To reset the articulation, we first set the root state by calling the Articulation.write_root_pose_to_sim() and Articulation.write_root_velocity_to_sim()
methods. Similarly, we set the joint states by calling the Articulation.write_joint_state_to_sim() method.
Finally, we call the Articulation.reset() method to reset any internal buffers and caches.
            # reset the scene entities
            # root state
            # we offset the root state by the origin since the states are written in simulation world frame
            # if this is not done, then the robots will be spawned at the (0, 0, 0) of the simulation world
            root_pose = robot.data.default_root_pose.torch.clone()
            root_pose[:, :3] += origins
            robot.write_root_pose_to_sim_index(root_pose=root_pose)
            root_vel = robot.data.default_root_vel.torch.clone()
            robot.write_root_velocity_to_sim_index(root_velocity=root_vel)
            # set joint positions with some noise
            joint_pos, joint_vel = (
                robot.data.default_joint_pos.torch.clone(),
                robot.data.default_joint_vel.torch.clone(),
            )
            joint_pos += torch.rand_like(joint_pos) * 0.1
            robot.write_joint_position_to_sim_index(position=joint_pos)
            robot.write_joint_velocity_to_sim_index(velocity=joint_vel)
            # clear internal buffers
            robot.reset()
Stepping the simulation#
Applying commands to the articulation involves two steps:
Setting the joint targets: This sets the desired joint position, velocity, or effort targets for the articulation.
Writing the data to the simulation: Based on the articulation’s configuration, this step handles any actuation conversions and writes the converted values to the PhysX buffer.
In this tutorial, we control the articulation using joint effort commands. For this to work, we need to set the articulation’s stiffness and damping parameters to zero. This is done a-priori inside the cart-pole’s pre-defined configuration object.
At every step, we randomly sample joint efforts and set them to the articulation by calling the
Articulation.set_joint_effort_target() method. After setting the targets, we call the
Articulation.write_data_to_sim() method to write the data to the PhysX buffer. Finally, we step
the simulation.
        # Apply random action
        # -- generate random joint efforts
        efforts = torch.randn_like(robot.data.joint_pos.torch) * 5.0
        # -- apply action to the robot
        robot.set_joint_effort_target_index(target=efforts)
        # -- write data to sim
        robot.write_data_to_sim()
Updating the state#
Every articulation class contains a assets.ArticulationData object. This stores the state of the
articulation. To update the state inside the buffer, we call the assets.Articulation.update() method.
        # Update buffers
        robot.update(sim_dt)
The Code Execution#
To run the code and see the results, let’s run the script from the terminal:
./isaaclab.sh -p scripts/tutorials/01_assets/run_articulation.py
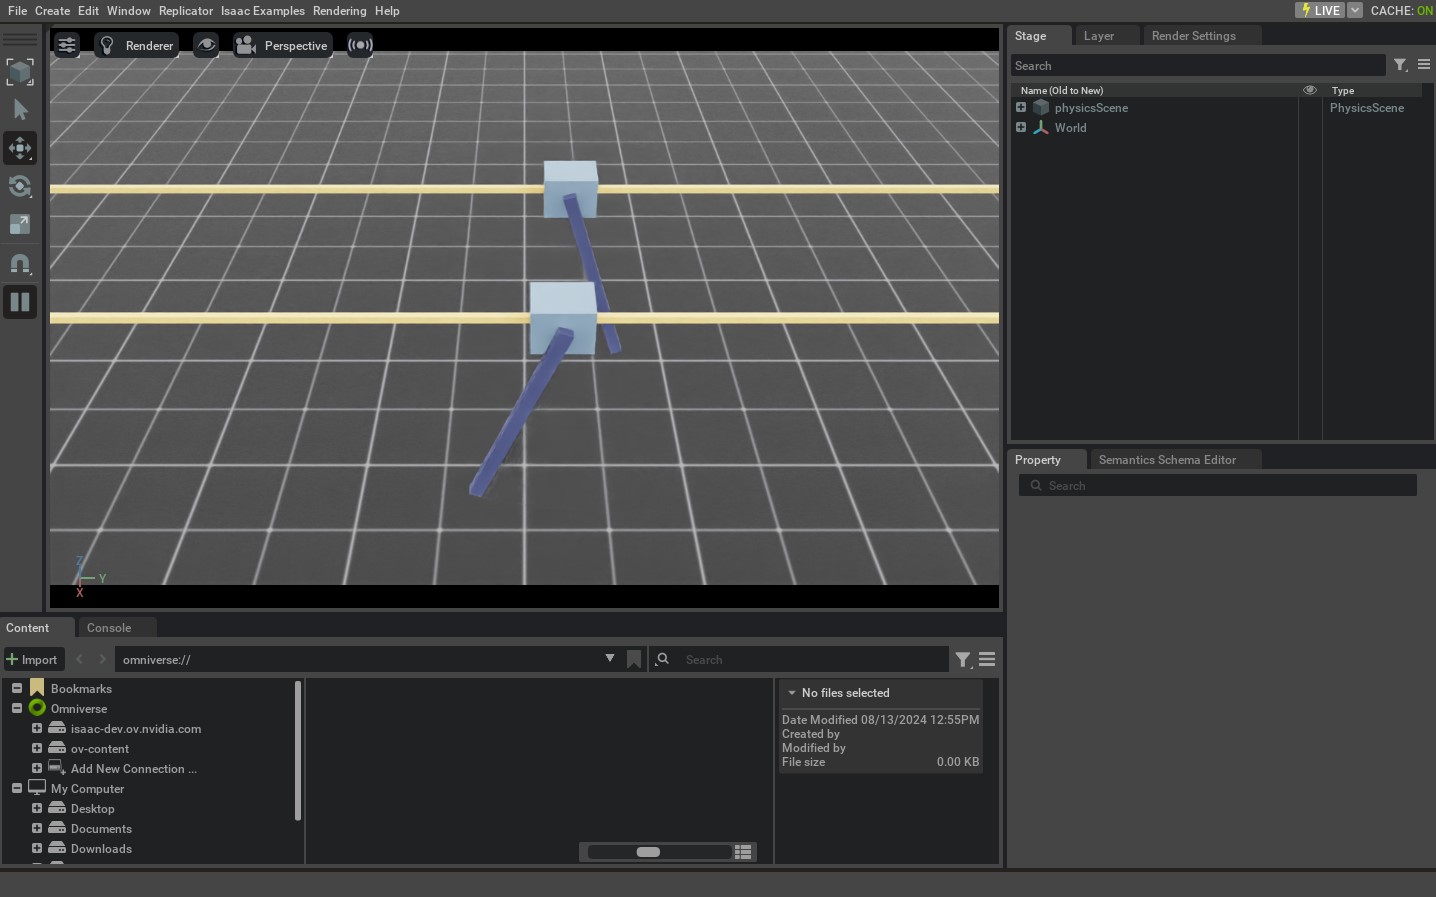
This command should open a stage with a ground plane, lights, and two cart-poles that are moving around randomly.
To stop the simulation, you can either close the window, or press Ctrl+C in the terminal.
In this tutorial, we learned how to create and interact with a simple articulation. We saw how to set the state of an articulation (its root and joint state) and how to apply commands to it. We also saw how to update its buffers to read the latest state from the simulation.
In addition to this tutorial, we also provide a few other scripts that spawn different robots. These are included
in the scripts/demos directory. You can run these scripts as:
# Spawn many different single-arm manipulators
./isaaclab.sh -p scripts/demos/arms.py

# Spawn many different quadrupeds
./isaaclab.sh -p scripts/demos/quadrupeds.py