Examples: Data Generation and Imitation Learning for Humanoids#
This page covers data generation and imitation learning workflows for humanoid robots (GR-1, G1) with Isaac Lab Mimic:
Demo 1: Data generation and policy training for a humanoid robot (GR-1 pick and place)
Demo 2: Visuomotor policy for a humanoid robot (GR-1 nut pouring)
Demo 3: Data generation and policy training for humanoid robot locomanipulation (Unitree G1)
Important
Complete the tutorial in Synthetic Data Generation and Imitation Learning with Isaac Lab Mimic before proceeding with the following demonstrations to understand the data collection, annotation, and generation steps of Isaac Lab Mimic.
Demo 1: Data Generation and Policy Training for a Humanoid Robot#
Isaac Lab Mimic supports data generation for robots with multiple end effectors. In the following demonstration, we will show how to generate data to train a Fourier GR-1 humanoid robot to perform a pick and place task.
Optional: Collect and annotate demonstrations#
Collect human demonstrations#
Note
Data collection for the GR-1 humanoid robot environment requires use of an Apple Vision Pro headset. If you do not have access to an Apple Vision Pro, you may skip this step and continue on to the next step: Generate the dataset. A pre-recorded annotated dataset is provided in the next step.
Tip
The GR1 scene utilizes the wrist poses from the Apple Vision Pro (AVP) as setpoints for a differential IK controller (Pink-IK). The differential IK controller requires the user’s wrist pose to be close to the robot’s initial or current pose for optimal performance. Rapid movements of the user’s wrist may cause it to deviate significantly from the goal state, which could prevent the IK controller from finding the optimal solution. This may result in a mismatch between the user’s wrist and the robot’s wrist. You can increase the gain of all the Pink-IK controller’s FrameTasks to track the AVP wrist poses with lower latency. However, this may lead to more jerky motion. Separately, the finger joints of the robot are retargeted to the user’s finger joints using the dex-retargeting library.
Set up the CloudXR Runtime and Apple Vision Pro for teleoperation by following the steps in Setting up Isaac Teleop with CloudXR. CPU simulation is used in the following steps for better XR performance when running a single environment.
Collect a set of human demonstrations. A success demo requires the object to be placed in the bin and for the robot’s right arm to be retracted to the starting position.
The Isaac Lab Mimic Env GR-1 humanoid robot is set up such that the left hand has a single subtask, while the right hand has two subtasks. The first subtask involves the right hand remaining idle while the left hand picks up and moves the object to the position where the right hand will grasp it. This setup allows Isaac Lab Mimic to interpolate the right hand’s trajectory accurately by using the object’s pose, especially when poses are randomized during data generation. Therefore, avoid moving the right hand while the left hand picks up the object and brings it to a stable position.

Left: A good human demonstration with smooth and steady motion. Right: A bad demonstration with jerky and exaggerated motion.
Collect five demonstrations by running the following command:
./isaaclab.sh -p scripts/tools/record_demos.py \
--task IsaacContrib-PickPlace-GR1T2-Abs \
--visualizer kit \
--xr \
--device cpu \
--num_demos 5 \
--dataset_file ./datasets/dataset_gr1.hdf5
Note
We also provide a GR-1 pick and place task with waist degrees-of-freedom enabled IsaacContrib-PickPlace-GR1T2-WaistEnabled-Abs (see Available Environments for details on the available environments, including the GR1 Waist Enabled variant). The same command above applies but with the task name changed to IsaacContrib-PickPlace-GR1T2-WaistEnabled-Abs.
Tip
If a demo fails during data collection, the environment can be reset using the teleoperation controls panel in the XR teleop client on the Apple Vision Pro or via voice control by saying “reset”. See Teleoperate with Apple Vision Pro for more details.
The robot uses simplified collision meshes for physics calculations that differ from the detailed visual meshes displayed in the simulation. Due to this difference, you may occasionally observe visual artifacts where parts of the robot appear to penetrate other objects or itself, even though proper collision handling is occurring in the physics simulation.
You can replay the collected demonstrations by running the following command:
./isaaclab.sh -p scripts/tools/replay_demos.py \
--task IsaacContrib-PickPlace-GR1T2-Abs \
--visualizer kit \
--device cpu \
--dataset_file ./datasets/dataset_gr1.hdf5
Note
Non-determinism may be observed during replay as physics in IsaacLab are not deterministically reproducible when using env.reset.
Annotate the demonstrations#
Unlike the Franka stacking task, the GR-1 pick and place task uses manual annotation to define subtasks.
The pick and place task has one subtask for the left arm (pick) and two subtasks for the right arm (idle, place). Annotations denote the end of a subtask. For the pick and place task, this means there are no annotations for the left arm and one annotation for the right arm (the end of the final subtask is always implicit).
Each demo requires a single annotation between the first and second subtask of the right arm. This annotation (“S” button press) should be done when the right robot arm finishes the “idle” subtask and begins to move towards the target object. An example of a correct annotation is shown below:

Annotate the demonstrations by running the following command:
./isaaclab.sh -p scripts/imitation_learning/isaaclab_mimic/annotate_demos.py \
--task Isaac-PickPlace-GR1T2-Abs-Mimic-v0 \
--visualizer kit \
--device cpu \
--input_file ./datasets/dataset_gr1.hdf5 \
--output_file ./datasets/dataset_annotated_gr1.hdf5
Note
The script prints the keyboard commands for manual annotation and the current subtask being annotated:
Annotating episode #0 (demo_0)
   Playing the episode for subtask annotations for eef "right".
   Subtask signals to annotate:
      - Termination:      ['idle_right']

   Press "N" to begin.
   Press "B" to pause.
   Press "S" to annotate subtask signals.
   Press "Q" to skip the episode.
Tip
If the object does not get placed in the bin during annotation, you can press “N” to replay the episode and annotate again. Or you can press “Q” to skip the episode and annotate the next one.
Generate the dataset#
If you skipped the prior collection and annotation step, download the pre-recorded annotated dataset dataset_annotated_gr1.hdf5 from
here: [Annotated GR1 Dataset].
Place the file under IsaacLab/datasets and run the following command to generate a new dataset with 1000 demonstrations.
./isaaclab.sh -p scripts/imitation_learning/isaaclab_mimic/generate_dataset.py \
--device cpu \
--num_envs 20 \
--generation_num_trials 1000 \
--input_file ./datasets/dataset_annotated_gr1.hdf5 \
--output_file ./datasets/generated_dataset_gr1.hdf5
Train a policy#
Use Robomimic to train a policy for the generated dataset.
./isaaclab.sh -p scripts/imitation_learning/robomimic/train.py \
--task IsaacContrib-PickPlace-GR1T2-Abs \
--algo bc \
--normalize_training_actions \
--dataset ./datasets/generated_dataset_gr1.hdf5
The training script will normalize the actions in the dataset to the range [-1, 1].
The normalization parameters are saved in the model directory under PATH_TO_MODEL_DIRECTORY/logs/normalization_params.txt.
Record the normalization parameters for later use in the visualization step.
Note
By default the trained models and logs will be saved to IsaacLab/logs/robomimic.
Visualize the results#
Visualize the results of the trained policy by running the following command, using the normalization parameters recorded in the prior training step:
./isaaclab.sh -p scripts/imitation_learning/robomimic/play.py \
--task IsaacContrib-PickPlace-GR1T2-Abs \
--visualizer kit \
--device cpu \
--num_rollouts 50 \
--horizon 400 \
--norm_factor_min <NORM_FACTOR_MIN> \
--norm_factor_max <NORM_FACTOR_MAX> \
--checkpoint /PATH/TO/desired_model_checkpoint.pth
Note
Change the NORM_FACTOR in the above command with the values generated in the training step.
Tip
If you don’t see expected performance results: It is critical to test policies from various checkpoint epochs. Performance can vary significantly between epochs, and the best-performing checkpoint is often not the final one.
The trained policy performing the pick and place task in Isaac Lab.#
Note
Expected Success Rates and Timings for Pick and Place GR1T2 Task
Success rate for data generation depends on the quality of human demonstrations (how well the user performs them) and dataset annotation quality. Both data generation and downstream policy success are sensitive to these factors and can show high variance. See Common Pitfalls when Generating Data for tips to improve your dataset.
Data generation success for this task is typically 65-80% over 1000 demonstrations, taking 18-40 minutes depending on GPU hardware and success rate (19 minutes on a RTX ADA 6000 @ 80% success rate).
Behavior Cloning (BC) policy success is typically 75-86% (evaluated on 50 rollouts) when trained on 1000 generated demonstrations for 2000 epochs (default), depending on demonstration quality. Training takes approximately 29 minutes on a RTX ADA 6000.
Recommendation: Train for 2000 epochs with 1000 generated demonstrations, and evaluate multiple checkpoints saved between the 1000th and 2000th epochs to select the best-performing policy. Testing various epochs is essential for finding optimal performance.
Demo 2: Visuomotor Policy for a Humanoid Robot#
Download the Dataset#
Download the pre-generated dataset from here and place it under IsaacLab/datasets/generated_dataset_gr1_nut_pouring.hdf5
(Note: The dataset size is approximately 15GB). The dataset contains 1000 demonstrations of a humanoid robot performing a pouring/placing task that was
generated using Isaac Lab Mimic for the Isaac-NutPour-GR1T2-Pink-IK-Abs-Mimic-v0 task.
Hint
If desired, data collection, annotation, and generation can be done using the same commands as the prior examples.
The robot first picks up the red beaker and pours the contents into the yellow bowl. Then, it drops the red beaker into the blue bin. Lastly, it places the yellow bowl onto the white scale. See the video in the Visualize the results section below for a visual demonstration of the task.
The success criteria for this task requires the red beaker to be placed in the blue bin, the green nut to be in the yellow bowl, and the yellow bowl to be placed on top of the white scale.
Attention
The following commands are only for your reference and are not required for this demo.
To collect demonstrations:
./isaaclab.sh -p scripts/tools/record_demos.py \
--task IsaacContrib-NutPour-GR1T2-Pink-IK-Abs \
--visualizer kit \
--device cpu \
--xr \
--num_demos 5 \
--dataset_file ./datasets/dataset_gr1_nut_pouring.hdf5
To annotate the demonstrations:
./isaaclab.sh -p scripts/imitation_learning/isaaclab_mimic/annotate_demos.py \
--task Isaac-NutPour-GR1T2-Pink-IK-Abs-Mimic-v0 \
--visualizer kit \
--enable_cameras \
--device cpu \
--input_file ./datasets/dataset_gr1_nut_pouring.hdf5 \
--output_file ./datasets/dataset_annotated_gr1_nut_pouring.hdf5
Warning
There are multiple right eef annotations for this task. Annotations for subtasks for the same eef cannot have the same action index. Make sure to annotate the right eef subtasks with different action indices.
To generate the dataset:
./isaaclab.sh -p scripts/imitation_learning/isaaclab_mimic/generate_dataset.py \
--task Isaac-NutPour-GR1T2-Pink-IK-Abs-Mimic-v0 \
--visualizer kit \
--enable_cameras \
--device cpu \
--generation_num_trials 1000 \
--num_envs 5 \
--input_file ./datasets/dataset_annotated_gr1_nut_pouring.hdf5 \
--output_file ./datasets/generated_dataset_gr1_nut_pouring.hdf5
Train a policy#
Use Robomimic to train a visuomotor BC agent for the task.
./isaaclab.sh -p scripts/imitation_learning/robomimic/train.py \
--task IsaacContrib-NutPour-GR1T2-Pink-IK-Abs \
--algo bc \
--normalize_training_actions \
--dataset ./datasets/generated_dataset_gr1_nut_pouring.hdf5
The training script will normalize the actions in the dataset to the range [-1, 1].
The normalization parameters are saved in the model directory under PATH_TO_MODEL_DIRECTORY/logs/normalization_params.txt.
Record the normalization parameters for later use in the visualization step.
Note
By default the trained models and logs will be saved to IsaacLab/logs/robomimic.
You can also post-train a GR00T foundation model to deploy a Vision-Language-Action policy for the task.
Please refer to the IsaacLabEvalTasks repository for more details.
Visualize the results#
Visualize the results of the trained policy by running the following command, using the normalization parameters recorded in the prior training step:
./isaaclab.sh -p scripts/imitation_learning/robomimic/play.py \
--task IsaacContrib-NutPour-GR1T2-Pink-IK-Abs \
--visualizer kit \
--device cpu \
--enable_cameras \
--num_rollouts 50 \
--horizon 350 \
--norm_factor_min <NORM_FACTOR_MIN> \
--norm_factor_max <NORM_FACTOR_MAX> \
--checkpoint /PATH/TO/desired_model_checkpoint.pth
Note
Change the NORM_FACTOR in the above command with the values generated in the training step.
Tip
If you don’t see expected performance results: Test policies from various checkpoint epochs, not just the final one. Policy performance can vary substantially across training, and intermediate checkpoints often yield better results.
The trained visuomotor policy performing the pouring task in Isaac Lab.#
Note
Expected Success Rates and Timings for Visuomotor Nut Pour GR1T2 Task
Success rate for data generation depends on the quality of human demonstrations (how well the user performs them) and dataset annotation quality. Both data generation and downstream policy success are sensitive to these factors and can show high variance. See Common Pitfalls when Generating Data for tips to improve your dataset.
Data generation for 1000 demonstrations takes approximately 10 hours on a RTX ADA 6000.
Behavior Cloning (BC) policy success is typically 50-60% (evaluated on 50 rollouts) when trained on 1000 generated demonstrations for 600 epochs (default). Training takes approximately 15 hours on a RTX ADA 6000.
Recommendation: Train for 600 epochs with 1000 generated demonstrations, and evaluate multiple checkpoints saved between the 300th and 600th epochs to select the best-performing policy. Testing various epochs is critical for achieving optimal performance.
Demo 3: Data Generation and Policy Training for Humanoid Robot Locomanipulation with Unitree G1#
In this demo, we showcase the integration of locomotion and manipulation capabilities within a single humanoid robot system. This locomanipulation environment enables data collection for complex tasks that combine navigation and object manipulation. The demonstration follows a multi-step process: first, it generates pick and place tasks similar to Demo 1, then introduces a navigation component that uses specialized scripts to generate scenes where the humanoid robot must move from point A to point B. The robot picks up an object at the initial location (point A) and places it at the target destination (point B).
Note
Locomotion policy training
The locomotion policy used in this integration example was trained using the AGILE framework. AGILE is an officially supported humanoid control training pipeline that leverages the manager based environment in Isaac Lab. It will also be seamlessly integrated with other evaluation and deployment tools across Isaac products. This allows teams to rely on a single, maintained stack covering all necessary infrastructure and tooling for policy training, with easy export to real-world deployment. The AGILE repository contains updated pre-trained policies with separate upper and lower body policies for flexibility. They have been verified in the real world and can be directly deployed. Users can also train their own locomotion or whole-body control policies using the AGILE framework.
Generate the manipulation dataset#
The same data generation and policy training steps from Demo 1 can be applied to the G1 humanoid robot with locomanipulation capabilities. This demonstration shows how to train a G1 robot to perform pick and place tasks with full-body locomotion and manipulation.
The process follows the same workflow as Demo 1, but uses the IsaacContrib-PickPlace-Locomanipulation-G1-Abs task environment.
Follow the same data collection, annotation, and generation process as demonstrated in Demo 1, but adapted for the G1 locomanipulation task.
Hint
If desired, data collection and annotation can be done using the same commands as the prior examples for validation of the dataset.
The G1 robot with locomanipulation capabilities combines full-body locomotion with manipulation to perform pick and place tasks.
Note that the following commands are only for your reference and dataset validation purposes - they are not required for this demo.
To collect demonstrations:
./isaaclab.sh -p scripts/tools/record_demos.py \
--device cpu \
--xr \
--visualizer kit \
--task IsaacContrib-PickPlace-Locomanipulation-G1-Abs \
--dataset_file ./datasets/dataset_g1_locomanip.hdf5 \
--num_demos 5
Note
Depending on how the Apple Vision Pro app was initialized, the hands of the operator might be very far up or far down compared to the hands of the G1 robot. If this is the case, you can click Stop XR in the XR tab in Isaac Lab, and move the AR Anchor prim. Adjust it down to bring the hands of the operator lower, and up to bring them higher. Click Start XR to resume teleoperation session. Make sure to match the hands of the robot before clicking Play in the Apple Vision Pro, otherwise there will be an undesired large force generated initially.
You can replay the collected demonstrations by running:
./isaaclab.sh -p scripts/tools/replay_demos.py \
--device cpu \
--visualizer kit \
--task IsaacContrib-PickPlace-Locomanipulation-G1-Abs \
--dataset_file ./datasets/dataset_g1_locomanip.hdf5
To annotate the demonstrations:
./isaaclab.sh -p scripts/imitation_learning/isaaclab_mimic/annotate_demos.py \
--device cpu \
--visualizer kit \
--task Isaac-Locomanipulation-G1-Abs-Mimic-v0 \
--input_file ./datasets/dataset_g1_locomanip.hdf5 \
--output_file ./datasets/dataset_annotated_g1_locomanip.hdf5
If you skipped the prior collection and annotation step, download the pre-recorded annotated dataset dataset_annotated_g1_locomanip.hdf5 from
here: [Annotated G1 Dataset].
Place the file under IsaacLab/datasets and run the following command to generate a new dataset with 1000 demonstrations.
./isaaclab.sh -p scripts/imitation_learning/isaaclab_mimic/generate_dataset.py \
--device cpu --num_envs 20 --generation_num_trials 1000 \
--input_file ./datasets/dataset_annotated_g1_locomanip.hdf5 --output_file ./datasets/generated_dataset_g1_locomanip.hdf5
Train a manipulation-only policy#
At this point you can train a policy that only performs manipulation tasks using the generated dataset:
./isaaclab.sh -p scripts/imitation_learning/robomimic/train.py \
--task IsaacContrib-PickPlace-Locomanipulation-G1-Abs --algo bc \
--normalize_training_actions \
--dataset ./datasets/generated_dataset_g1_locomanip.hdf5
Visualize the results#
Visualize the trained policy performance:
./isaaclab.sh -p scripts/imitation_learning/robomimic/play.py \
--device cpu \
--visualizer kit \
--task IsaacContrib-PickPlace-Locomanipulation-G1-Abs \
--num_rollouts 50 \
--horizon 400 \
--norm_factor_min <NORM_FACTOR_MIN> \
--norm_factor_max <NORM_FACTOR_MAX> \
--checkpoint /PATH/TO/desired_model_checkpoint.pth
Note
Change the NORM_FACTOR in the above command with the values generated in the training step.
Tip
If you don’t see expected performance results: Always test policies from various checkpoint epochs. Different epochs can produce significantly different results, so evaluate multiple checkpoints to find the optimal model.
The trained policy performing the pick and place task in Isaac Lab.#
Note
Expected Success Rates and Timings for Locomanipulation Pick and Place Task
Success rate for data generation depends on the quality of human demonstrations (how well the user performs them) and dataset annotation quality. Both data generation and downstream policy success are sensitive to these factors and can show high variance. See Common Pitfalls when Generating Data for tips to improve your dataset.
Data generation success for this task is typically 65-82% over 1000 demonstrations, taking 18-40 minutes depending on GPU hardware and success rate (18 minutes on a RTX ADA 6000 @ 82% success rate).
Behavior Cloning (BC) policy success is typically 75-85% (evaluated on 50 rollouts) when trained on 1000 generated demonstrations for 2000 epochs (default), depending on demonstration quality. Training takes approximately 40 minutes on a RTX ADA 6000.
Recommendation: Train for 2000 epochs with 1000 generated demonstrations, and evaluate multiple checkpoints saved between the 1000th and 2000th epochs to select the best-performing policy. Testing various epochs is essential for finding optimal performance.
Generate the dataset with manipulation and point-to-point navigation#
To create a comprehensive locomanipulation dataset that combines both manipulation and navigation capabilities, you can generate a navigation dataset using the manipulation dataset from the previous step as input.
Tip
Skip data generation: A pre-made locomanipulation dataset in LeRobot format is available on Hugging Face at nvidia/g1_locomanip_dataset. Downloading it lets you skip this section and the dataset conversion step, proceeding directly to Finetune the policy below.
Download and unzip the dataset:
huggingface-cli download nvidia/g1_locomanip_dataset --repo-type dataset --local-dir ./datasets/g1_locomanip_hf
unzip ./datasets/g1_locomanip_hf/*.zip -d ./datasets/
The archive extracts to ./datasets/g1_simple_high_var_lerobot/.
Use this path as the --dataset-path in the finetuning step.
Policies trained on this dataset require --policy_quat_format wxyz at rollout time.

The locomanipulation dataset generation process takes the previously generated manipulation dataset and creates scenarios where the robot must navigate from one location to another while performing manipulation tasks. This creates a more complex dataset that includes both locomotion and manipulation behaviors.
To generate the locomanipulation dataset, use the following command:
./isaaclab.sh -p \
    scripts/imitation_learning/locomanipulation_sdg/generate_data.py \
    --device cpu \
    --kit_args="--enable isaacsim.replicator.experimental.mobility_gen" \
    --task="Isaac-G1-SteeringWheel-Locomanipulation" \
    --dataset ./datasets/generated_dataset_g1_locomanip.hdf5 \
    --num_runs 1 \
    --lift_step 60 \
    --navigate_step 130 \
    --output_file ./datasets/generated_dataset_g1_locomanipulation_sdg.hdf5 \
    --enable_cameras \
    --randomize_placement \
    --visualizer kit
Note
The input dataset (--dataset) should be the manipulation dataset generated in the previous step. You can specify any output filename using the --output_file_name parameter.
The key parameters for locomanipulation dataset generation are:
--lift_step 60: Number of steps for the lifting phase of the manipulation task. This should mark the point immediately after the robot has grasped the object.--navigate_step 130: Number of steps for the navigation phase between locations. This should mark the point where the robot has lifted the object and is ready to walk.--output_file: Name of the output dataset file
Note
You can change the number of obstacles (forklifts and boxes) in the scene by editing the locomanipulation SDG environment configuration. In source/isaaclab_mimic/isaaclab_mimic/locomanipulation_sdg/envs/g1_locomanipulation_sdg_env.py, set the module-level constants NUM_FORKLIFTS and NUM_BOXES to the desired counts. Use --randomize_placement when running generate_data.py to randomize obstacle and fixture positions each run.
This process creates a dataset where the robot performs the manipulation task at different locations, requiring it to navigate between points while maintaining the learned manipulation behaviors. The resulting dataset can be used to train policies that combine both locomotion and manipulation capabilities.
Note
You can visualize the robot trajectory results with the following script command:
./isaaclab.sh -p scripts/imitation_learning/locomanipulation_sdg/plot_navigation_trajectory.py --input_file datasets/generated_dataset_g1_locomanipulation_sdg.hdf5 --output_dir /PATH/TO/DESIRED_OUTPUT_DIR
The data generated from this locomanipulation pipeline can also be used to finetune an imitation learning policy using GR00T N1.5. The following steps describe how to install GR00T, convert the dataset to LeRobot format, finetune the policy, and run rollouts in Isaac Lab.
Finetune GR00T N1.5 policy for locomanipulation#
Prerequisites: Generate the locomanipulation dataset using the command in the previous section (e.g. generated_dataset_g1_locomanipulation_sdg.hdf5).
The conversion step accepts a directory of SDG HDF5 files, so you may group multiple generate_data.py outputs together — but the directory must contain only SDG outputs, not other HDF5 files from earlier steps (e.g. dataset_annotated_g1_locomanip.hdf5 or generated_dataset_g1_locomanip.hdf5).
Install GR00T with Isaac Lab (uv)#
Clone the Isaac-GR00T repository and install GR00T N1.5 in the same uv environment used for Isaac Lab. From a parent directory that contains both repositories (or adjust paths accordingly), run:
git clone -b n1.5-release https://github.com/NVIDIA/Isaac-GR00T
Copy the G1 locomanipulation data config from Isaac Lab into the GR00T experiment data config:
cp IsaacLab/scripts/imitation_learning/locomanipulation_sdg/gr00t/data_config.py Isaac-GR00T/gr00t/experiment/data_config.py
Then, from the Isaac-GR00T directory, install GR00T N1.5 and its dependencies:
cd Isaac-GR00T
uv pip install -e .
uv pip install wheel
MAX_JOBS=4 uv pip install --no-build-isolation flash-attn==2.7.1.post4
MAX_JOBS=4 uv pip install --no-build-isolation 'git+https://github.com/facebookresearch/pytorch3d.git@v0.7.9'
uv pip install diffusers decord zmq
Note
If you cannot install or use flash-attn, an optional patch is provided that switches the
bundled Eagle 2.5 VL model to PyTorch SDPA. Use this if flash-attn fails to build for your
environment, or if it installs but raises a runtime error such as
RuntimeError: FlashAttention only supports Ampere GPUs or newer (for example on Blackwell
GPUs, which flash-attn==2.7.1.post4 does not have prebuilt kernels for). After the patch,
finetune and rollout run on any CUDA arch supported by your PyTorch build, at the cost of
flash-attn’s training speedup. Skip the flash-attn install line above, then apply the
patch from the Isaac-GR00T directory (the sibling layout above means the IsaacLab
checkout is at ../IsaacLab):
git apply ../IsaacLab/scripts/imitation_learning/locomanipulation_sdg/gr00t/no_flash_attn.patch
Convert dataset to LeRobot format#
GR00T N1.5 expects data in LeRobot format. From the IsaacLab repository root, run the conversion script. <input_dir> is a directory containing one or more SDG .hdf5 files produced by generate_data.py (and no other HDF5 files). <output_path> is the LeRobot-format output directory (e.g. ./datasets/datasets_train_200_lerobot). Episodes with very low object displacement are skipped.
./isaaclab.sh -p scripts/imitation_learning/locomanipulation_sdg/gr00t/convert_dataset.py <input_dir> <output_path>
Example — move the SDG output into its own directory first so the converter only sees SDG files:
mkdir -p ./datasets/locomanip_sdg
mv ./datasets/generated_dataset_g1_locomanipulation_sdg.hdf5 ./datasets/locomanip_sdg/
./isaaclab.sh -p scripts/imitation_learning/locomanipulation_sdg/gr00t/convert_dataset.py ./datasets/locomanip_sdg ./datasets/datasets_train_200_lerobot
Finetune the policy#
Run finetuning from the Isaac-GR00T repository root. Use the LeRobot-format output path from the previous step as --dataset-path and choose an --output-dir for checkpoints. The --data-config g1_locomanipulation_sdg and --embodiment-tag new_embodiment options are required for the G1 locomanipulation task.
cd Isaac-GR00T
python scripts/gr00t_finetune.py \
    --dataset-path <path_to_lerobot_output> \
    --output-dir <checkpoint_dir> \
    --data-config g1_locomanipulation_sdg \
    --embodiment-tag new_embodiment \
    --num-gpus 1 \
    --max-steps 10000 \
    --save-steps 1000 \
    --video-backend decord \
    --report-to tensorboard
See the GR00T N1.5 repository documentation for additional training options.
Tip
Skip finetuning: A pre-trained GR00T N1.5 checkpoint for this task is available on Hugging Face at nvidia/g1_locomanip_finetune. Downloading it lets you skip the finetuning step and proceed directly to rollout.
Download and unzip the checkpoint:
huggingface-cli download nvidia/g1_locomanip_finetune --local-dir ./checkpoints/g1_locomanip_finetune_hf
unzip ./checkpoints/g1_locomanip_finetune_hf/*.zip -d ./checkpoints/
The archive extracts to ./checkpoints/g1_locomanip_finetune_20260129_231610/.
Use ./checkpoints/g1_locomanip_finetune_20260129_231610/checkpoint-20000 as the --model_path
in the rollout command below. This checkpoint requires --policy_quat_format wxyz.
Rollout the policy in Isaac Lab#
From the IsaacLab repository root, run the rollout script with the path to your finetuned checkpoint, the static manipulation dataset (used for scene/demo setup), and the task name:
./isaaclab.sh -p scripts/imitation_learning/locomanipulation_sdg/gr00t/rollout_policy.py \
    --model_path <checkpoint_dir_or_file> \
    --embodiment_tag new_embodiment \
    --dataset ./datasets/generated_dataset_g1_locomanip.hdf5 \
    --demo demo_0 \
    --output_file ./datasets/rollout_output.hdf5 \
    --task Isaac-G1-SteeringWheel-Locomanipulation \
    --device cpu \
    --enable_cameras \
    --visualizer kit
Optional arguments include --randomize_placement and --policy_quat_format wxyz (use if your checkpoint was trained with wxyz quaternion format).
Simulation rollout of GR00T N1.5 policy finetuned for locomanipulation.#
The policy shown above uses the camera image, hand poses, hand joint positions, object pose, and base goal pose as inputs. The output of the model is the target base velocity, hand poses, and hand joint positions for the next several timesteps.
Integrating 3D Gaussian Splatting into SDG#
This section extends locomanipulation SDG by replacing the synthetic background with a 3D Gaussian Splatting (NuRec) scene. As in the base pipeline, the workflow takes a manipulation dataset as input and produces a combined navigation and manipulation dataset as an HDF5 file — but here the robot navigates and manipulates objects inside a neurally-rendered environment, and an ego-centric camera captures the result, producing more realistic training data than a purely synthetic scene. NVIDIA Isaac Sim renders 3DGS models stored as USD assets; see Neural Volume Rendering for details.
Note
This section focuses on data generation with a 3DGS background. To train a policy on the generated data, see Finetune GR00T N1.5 policy for locomanipulation.
Note
The locomanipulation SDG pipeline currently runs a single environment. Parallel environment support is not yet available for this workflow.
Setup: downloading example assets#
We provide a sample asset, hand_hold-voyager-babyboom, on
Hugging Face.
Log in to Hugging Face:
hf auth login --token <your_huggingface_access_token>
Download the required USDZ stage files and occupancy maps:
hf download nvidia/PhysicalAI-Robotics-NuRec \
   hand_hold-voyager-babyboom/stage_volume.usdz \
   hand_hold-voyager-babyboom/stage_particle.usdz \
   hand_hold-voyager-babyboom/occupancy_map.png \
   hand_hold-voyager-babyboom/occupancy_map.yaml \
   --repo-type dataset \
   --local-dir <PATH_TO_USD_ASSET>
The sample includes both a volume-based USD (stage_volume.usdz) and a particle-field USD
(stage_particle.usdz). Either can be used as the background asset.
Asset requirements#
If you are using custom 3D Gaussian assets, ensure they meet these specifications to be compatible with the SDG pipeline:
The scene has sufficient free space (e.g. 5m x 5m) for asset placement and robot navigation.
The ground surface is aligned with the z=0 plane, as the pipeline assumes this elevation for object placement.
An occupancy map is required for path planning.
If your scene was reconstructed using the Stereo Workflow, the occupancy map is generated via
nvblox.If your background includes a mesh, use the Occupancy Map Generator to create a map via physical simulation.
Generating the dataset#
Before proceeding, ensure you have generated a manipulation dataset or downloaded the sample dataset provided in the Generate the manipulation dataset section.
Once you have gathered:
A manipulation dataset
A background USD asset
A matched occupancy map
you can run the generation command. At runtime, the script adds a ground plane at z=0 to
the scene. It then proceeds through four stages:
Pick: The robot picks up an object at the start location by replaying the manipulation trajectory.
--lift_stepmarks the end of this stage (immediately after grasp).Navigate: The robot travels to the target location using occupancy-map path planning and its locomotion policy.
--navigate_stepmarks the end of this stage (when the robot is in place to release the object).Place: The robot places the object at the target location, completing the trajectory.
Record: Joint states, poses, and the ego-centric video are saved to the HDF5 file specified by
--output_file.
Run the generation command:
./isaaclab.sh -p scripts/imitation_learning/locomanipulation_sdg/generate_data.py \
    --device cpu \
    --kit_args="--enable isaacsim.replicator.experimental.mobility_gen" \
    --task="Isaac-G1-SteeringWheel-Locomanipulation" \
    --dataset <DATASET_FOLDER>/dataset_annotated_g1_locomanip.hdf5 \
    --num_runs 1 \
    --lift_step 60 \
    --navigate_step 130 \
    --output_file <DATASET_FOLDER>/generated_dataset_g1_locomanipulation_sdg_gaussian_background.hdf5 \
    --enable_cameras \
    --visualizer kit \
    --background_usd_path <PATH_TO_USD_ASSET>/stage_particle.usdz \
    --background_occupancy_yaml_file <PATH_TO_USD_ASSET>/occupancy_map.yaml \
    --randomize_placement \
    --high_res_video
The key parameters are:
--background_usd_path: Path to the 3D Gaussian background USD asset.--background_occupancy_yaml_file: Path to the occupancy map file.--high_res_video: Capture the ego-centric camera at 960×540 instead of the default 256×160.
When the run completes successfully, an HDF5 dataset is generated containing camera observations. You can convert the ego-centric camera view to MP4:
./isaaclab.sh -p scripts/tools/hdf5_to_mp4.py \
   --input_file <DATASET_FOLDER>/generated_dataset_g1_locomanipulation_sdg_gaussian_background.hdf5 \
   --output_dir <DATASET_FOLDER>/ \
   --input_keys robot_pov_cam \
   --video_width 960 \
   --video_height 540
Set --video_width and --video_height to match the resolution captured during
generation: 960×540 with --high_res_video, or 256×160 without it.
To play the generated MP4 video on Ubuntu, install the following multimedia packages:
sudo apt update
sudo apt install libavcodec-extra gstreamer1.0-libav gstreamer1.0-plugins-ugly
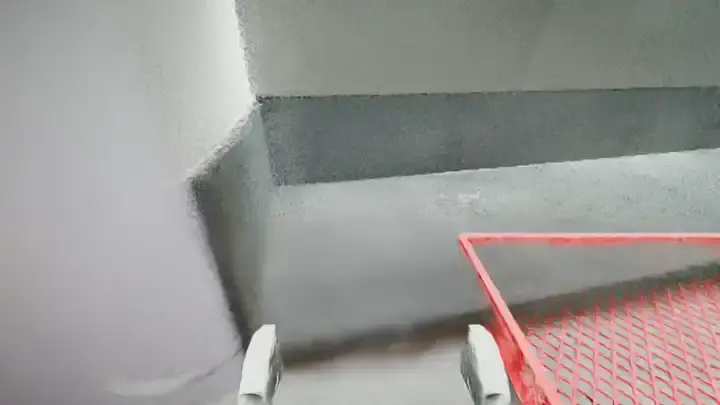
The figure above shows recorded ego-centric camera views in the 3D Gaussian background when the robot replays the pick and place trajectory and navigates to the target location.