Synthetic Data Generation and Imitation Learning with Isaac Lab Mimic#
Important
Isaac Lab Mimic is only supported on Linux.
What is Isaac Lab Mimic?#
Isaac Lab Mimic (Mimic) is a trajectory data generation tool that can be used to augment human demonstrations by generating new synthetic data. Given a set of human demonstrations, Mimic can automatically generate new demonstrations involving the same task but with different spatial configurations. The generated data can be used to train imitation learning policies that are more robust to spatial variations even if just a handful of manual demonstrations are available.
Mimic works by taking a set of human demonstrations and splitting each demonstration into a sequence of subtasks. Subtasks are defined based on reference objects that dictate the motion of the robot’s end-effectors (eefs). Each subtask is a contiguous segment of the demonstration where the eef’s motion is dictated by a single reference object. A new subtask begins when the reference object changes. Annotations mark points in the demonstration where a subtask is completed.
During data generation, Mimic takes the human demonstration subtask segments and applies rigid body transformations to the robot’s actions to transform them into new demonstrations involving the same task but with different spatial configurations. The new demonstrations are evaluated to determine if they are successful, and if so, are added to the output dataset.
Mimic is compatible with a variety of embodiments including single-eef (e.g. manipulator robots) and multi-eef (e.g. humanoid robots). The use of rigid body transformations requires that the embodiment’s action space is defined in task space. If the embodiment’s action is in joint space, then the action must be converted to task space using forward kinematics.
In the following sections, we will show how to collect a small batch of human demonstrations for a stacking task with the Franka robot, increase the size of the dataset by generating new synthetic data using Isaac Lab Mimic, and lastly train a policy to perform the stacking task.
Step 1: Human Data Collection#
Note
You may skip this step and proceed directly to Step 2: Synthetic Data Generation using Isaac Lab Mimic if you do not wish to collect your own demonstrations.
Environment Introduction#
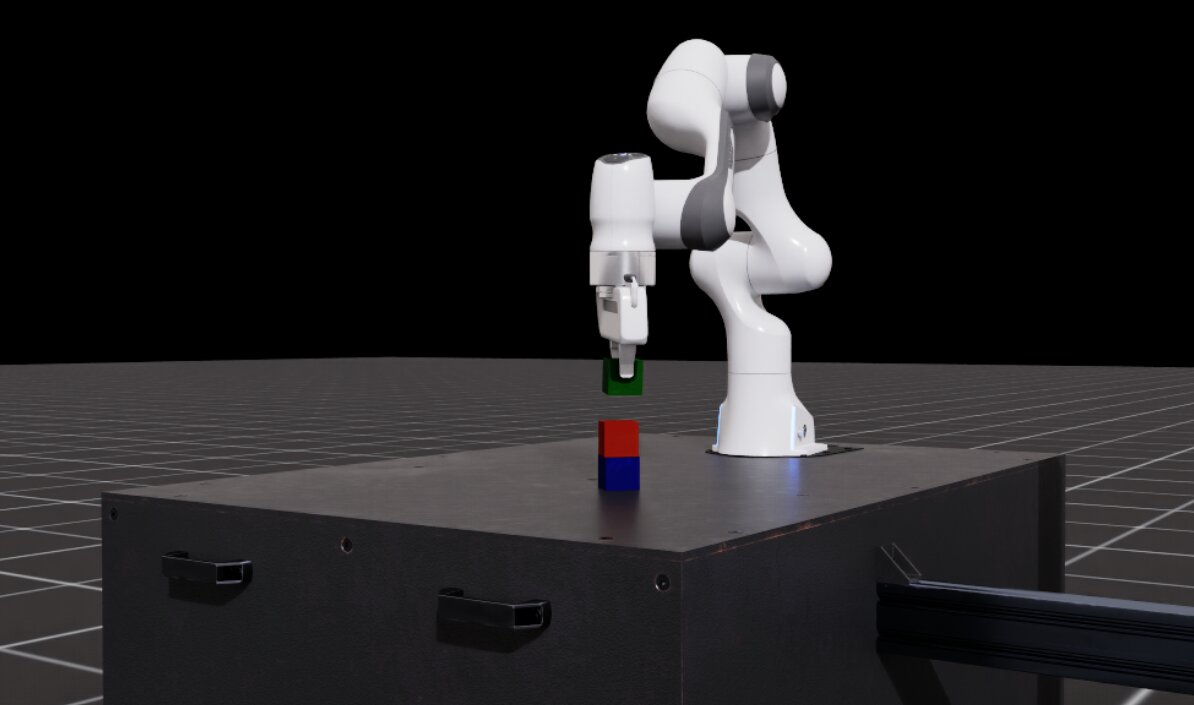
The environment we will be using in this tutorial is IsaacContrib-Stack-Cube-Franka-IK-Rel and its variations.
This environment contains a Franka robot attached to a table with three cubes.
The task is to stack the cubes in the following order: blue (bottom), red (middle), green (top). As you proceed through
the rest of this tutorial, you will encounter variations of this environment with different observation spaces
(e.g. state-based, visuomotor, etc.).
Run the following command to spin up and visualize the environment using the zero_agent.py
script provided by Isaac Lab. This script create and step through the environment in a loop with zero tensor actions.
You will see the robot remain stationary while the environment is running. Use the scroll wheel to zoom in and out of the scene.
Press and hold the alt key while clicking and dragging to pan around the scene.
uv run python scripts/environments/zero_agent.py \
--task IsaacContrib-Stack-Cube-Franka-IK-Rel \
--viz kit \
--num_envs 1
Next, use the random_agent.py script to spin up the environment and perform random actions. The script will create
and step through the environment in a loop with random tensor actions. You will see the robot move in random
directions.
uv run python scripts/environments/random_agent.py \
--task IsaacContrib-Stack-Cube-Franka-IK-Rel \
--viz kit \
--num_envs 1
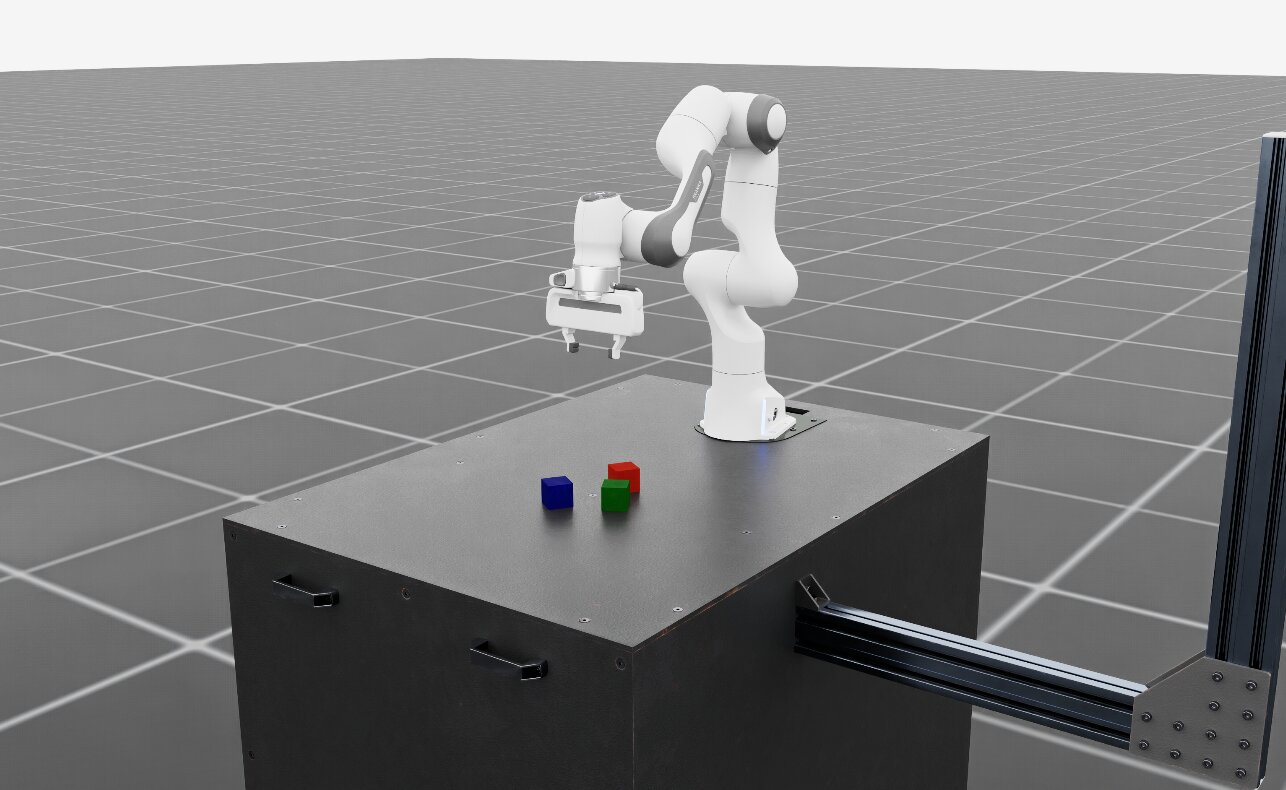
Franka cube stacking environment#
Teleoperation#
Isaac Lab supports teleoperation of robots through a variety of input devices including keyboard, SpaceMouse, and XR headsets.
Run the following command to spin up the environment and teleoperate the robot using the keyboard. Familiarize yourself with the controls and perform the stacking task. The order of the stacked cubes should be blue (bottom), red (middle), green (top). Once you feel sufficiently comfortable with the controls, you may shutdown the environment by quitting the script with Ctrl+C.
uv run python scripts/environments/teleoperation/teleop_se3_agent.py \
--task IsaacContrib-Stack-Cube-Franka-IK-Rel \
--viz kit \
--num_envs 1 \
--sensitivity 4 \
--teleop_device keyboard
The script will print a helper message with key bindings. For keyboard, the key bindings are:
Keyboard Controller for SE(3): Se3Keyboard
   Reset all commands: R
   Toggle gripper (open/close): K
   Move arm along x-axis: W/S
   Move arm along y-axis: A/D
   Move arm along z-axis: Q/E
   Rotate arm along x-axis: Z/X
   Rotate arm along y-axis: T/G
   Rotate arm along z-axis: C/V
For smoother and simultaneous multi-axis operation, we recommend using a SpaceMouse as the input device.
Providing smoother demonstrations will make it easier for the policy to clone the behavior.
Isaac Lab supports the 3Dconnexion SpaceMouse Compact
and SpaceMouse Wireless.
To use a SpaceMouse, simply change --teleop_device accordingly:
uv run python scripts/environments/teleoperation/teleop_se3_agent.py \
--task IsaacContrib-Stack-Cube-Franka-IK-Rel \
--viz kit \
--num_envs 1 \
--sensitivity 4 \
--teleop_device spacemouse
The script will print a helper message with key bindings. For SpaceMouse, the key bindings are:
SpaceMouse Controller for SE(3): Se3SpaceMouse
   Reset all commands: Right click
   Toggle gripper (open/close): Click the left button on the SpaceMouse
   Move arm along x/y-axis: Tilt the SpaceMouse
   Move arm along z-axis: Push or pull the SpaceMouse
   Rotate arm: Twist the SpaceMouse
Tip
If the SpaceMouse is not detected, you may need to grant additional user permissions by running sudo chmod 666 /dev/hidraw<#> where <#> corresponds to the device index
of the connected SpaceMouse.
To determine the device index, list all hidraw devices by running ls -l /dev/hidraw*.
Identify the device corresponding to the SpaceMouse by running cat /sys/class/hidraw/hidraw<#>/device/uevent on each of the devices listed
from the prior step.
We recommend using local deployment of Isaac Lab to use the SpaceMouse. If using container deployment (Docker Guide), you must manually mount the SpaceMouse to the isaac-lab-base container by
adding a devices attribute with the path to the device in your docker-compose.yaml file:
devices:
   - /dev/hidraw<#>:/dev/hidraw<#>
where <#> is the device index of the connected SpaceMouse.
Isaac Lab is only compatible with the SpaceMouse Wireless and SpaceMouse Compact models from 3Dconnexion.
(Optional) Teleoperation with XR Headsets#
For tasks that benefit from the use of an extended reality (XR) device with hand tracking, Isaac Lab supports using Isaac Teleop with NVIDIA CloudXR to immersively stream the scene to compatible XR devices for teleoperation.
Follow the steps in Setting up Isaac Teleop with CloudXR to learn how to install Isaac Teleop and set up CloudXR for
teleoperation. Once you have set it up, you can launch the cube stacking environment with the follow command to try it out
with an XR headset. Note that when using hand tracking, we recommend using the absolute action space
variant of the task (IsaacContrib-Stack-Cube-Franka-IK-Abs):
uv run python scripts/environments/teleoperation/teleop_se3_agent.py \
--task IsaacContrib-Stack-Cube-Franka-IK-Abs \
--viz kit \
--xr
Tip
For more information on teleoperation devices in Isaac Lab, see Isaac Teleop for a comprehensive overview of the teleop framework. See Supported Devices for a list of supported XR devices and Add a New Device for information on adding new devices.
Collect a Dataset of Human Demonstrations#
Make a new folder in the IsaacLab root directory to store datasets:
mkdir -p datasets
Run the record demos script to collect a set of 10 human demonstrations for the cube stacking task. Select the tab that matches your input device:
uv run python scripts/tools/record_demos.py \
--task IsaacContrib-Stack-Cube-Franka-IK-Rel \
--viz kit \
--dataset_file ./datasets/dataset.hdf5 \
--num_demos 10 \
--teleop_device keyboard
uv run python scripts/tools/record_demos.py \
--task IsaacContrib-Stack-Cube-Franka-IK-Rel \
--viz kit \
--dataset_file ./datasets/dataset.hdf5 \
--num_demos 10 \
--teleop_device spacemouse
When using hand tracking via an XR headset, use the absolute action space
variant of the task and omit --teleop_device. The IsaacTeleop pipeline
is activated automatically via the --xr flag.
uv run python scripts/tools/record_demos.py \
--task IsaacContrib-Stack-Cube-Franka-IK-Abs \
--viz kit \
--dataset_file ./datasets/dataset.hdf5 \
--num_demos 10 \
--xr
Note
Ensure CloudXR is configured and the headset is connected before running. See Setting up Isaac Teleop with CloudXR for setup instructions.
Important
The order of the stacked cubes should be blue (bottom), red (middle), green (top).
Tips for collecting good demonstrations:
Keep demonstrations short. Shorter demonstrations mean fewer decisions for the policy, making training easier.
Take a direct path and move efficiently toward the goal.
Do not have extended pauses. Instead, perform smooth, continuous motions. It is not obvious for a policy why and when to pause, hence continuous motions are easier to learn.
If a mistake is made while performing a demonstration, press the R key (if using a keyboard) or the
right button (if using a SpaceMouse) to discard the current demonstration and reset to a new starting position.
You can replay the collected demonstrations by running:
uv run python scripts/tools/replay_demos.py \
--task IsaacContrib-Stack-Cube-Franka-IK-Rel \
--viz kit \
--num_envs 1 \
--reset_sim_buffer_each_episode \
--dataset_file ./datasets/dataset.hdf5
Collect 10 successful demonstrations before proceeding to the next step.
Step 2: Synthetic Data Generation using Isaac Lab Mimic#
(Optional) Download Pre-recorded Human Demonstrations#
We provide a pre-recorded HDF5 dataset containing 10 human demonstrations for the cube stacking task here: [Cube Stacking Human Dataset]. If you skipped Step 1: Human Data Collection, you can download this dataset and use it in the remaining tutorial steps.
Place the dataset in the IsaacLab/datasets folder. You may need to create the folder if you skipped Step 1 and
have not created it yet.
Generate Additional Synthetic Demonstrations#
In the following example, we will show how to use Isaac Lab Mimic to generate additional demonstrations that can be used to train either a state-based policy
(using the Isaac-Stack-Cube-Franka-IK-Rel-Mimic-v0 environment) or visuomotor policy (using the Isaac-Stack-Cube-Franka-IK-Rel-Visuomotor-Mimic-v0 environment)
to teach a Franka robot to stack cubes.
Before generating additional demonstrations, the human demonstrations must first be annotated to define the boundary of each subtask. Subtasks are defined for each end-effector (eef) and are segments in the demonstrations where the eef is performing an action relative to a specific object. Any time the target object of the eef changes, a new subtask begins. For example, in the stacking task, the first subtask is to grasp the red cube (eef motion is dictated by the red cube), while the second subtask is to stack the red cube on top of the blue cube (eef motion is dictated by the blue cube). Subtasks can be annotated manually or (if the environment supports it) automatically using heuristics. For this tutorial, our environment supports automatic annotation which will be used in the following step.
Important
All commands in the following sections must keep a consistent policy type. For example, if choosing to use a state-based policy, then all commands used should be from the “State-based policy” tab.
Annotate the subtasks in the recording:
uv run python scripts/imitation_learning/isaaclab_mimic/annotate_demos.py \
--task Isaac-Stack-Cube-Franka-IK-Rel-Mimic-v0 \
--viz kit \
--auto \
--input_file ./datasets/dataset.hdf5 \
--output_file ./datasets/annotated_dataset.hdf5
uv run python scripts/imitation_learning/isaaclab_mimic/annotate_demos.py \
--task Isaac-Stack-Cube-Franka-IK-Rel-Visuomotor-Mimic-v0 \
--viz kit \
--auto \
--input_file ./datasets/dataset.hdf5 \
--output_file ./datasets/annotated_dataset.hdf5
Next, use Isaac Lab Mimic to generate some additional demonstrations:
uv run python scripts/imitation_learning/isaaclab_mimic/generate_dataset.py \
--viz kit \
--num_envs 20 \
--generation_num_trials 10 \
--input_file ./datasets/annotated_dataset.hdf5 \
--output_file ./datasets/generated_dataset_small.hdf5
uv run python scripts/imitation_learning/isaaclab_mimic/generate_dataset.py \
--viz kit \
--num_envs 20 \
--generation_num_trials 10 \
--input_file ./datasets/annotated_dataset.hdf5 \
--output_file ./datasets/generated_dataset_small.hdf5
Tip
The output_file of annotate_demos.py is the input_file to generate_dataset.py.
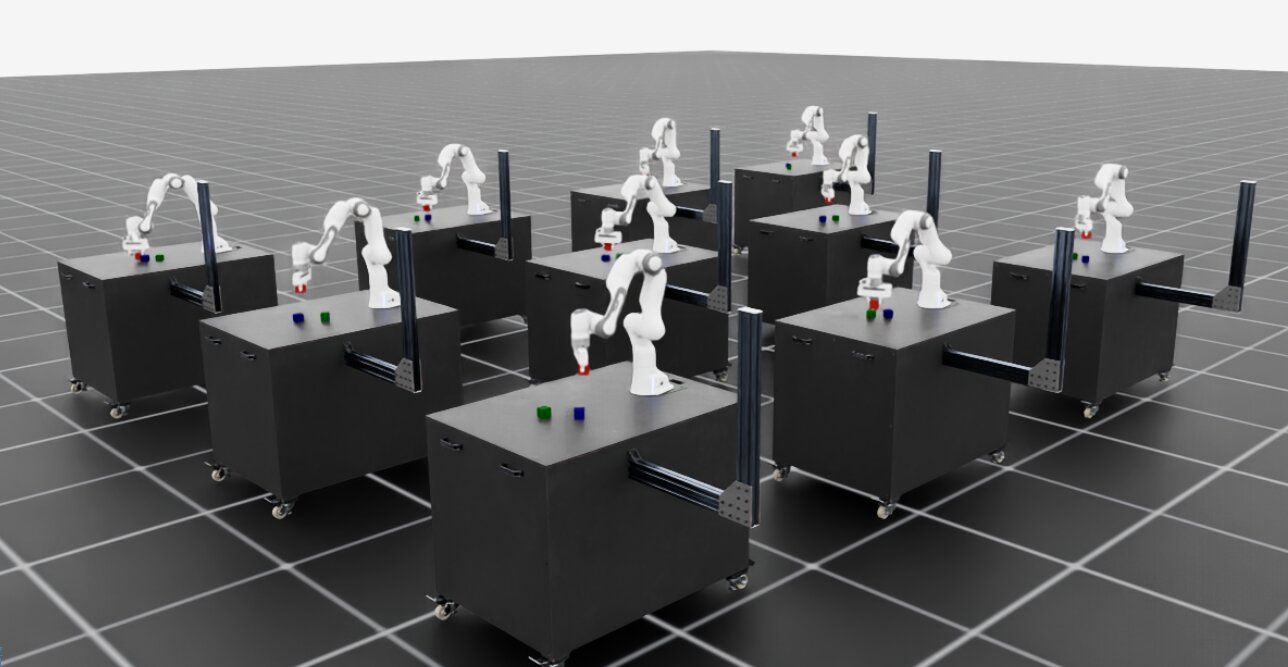
Parallel data generation for the Franka cube stacking task#
Inspect the generated data (generated_dataset_small.hdf5) and if satisfactory, generate the full dataset:
uv run python scripts/imitation_learning/isaaclab_mimic/generate_dataset.py \
--num_envs 1000 \
--generation_num_trials 1000 \
--input_file ./datasets/annotated_dataset.hdf5 \
--output_file ./datasets/generated_dataset.hdf5
uv run python scripts/imitation_learning/isaaclab_mimic/generate_dataset.py \
--num_envs 300 \
--generation_num_trials 1000 \
--input_file ./datasets/annotated_dataset.hdf5 \
--output_file ./datasets/generated_dataset.hdf5
The number of demonstrations --generation_num_trials can be adjusted to your policy needs.
1000 demonstrations have been shown to provide good training results for the BC RNN policy used in this tutorial.
The number of environments in the --num_envs parameter can be adjusted to speed up or slow down data generation.
The suggested values assume an RTX PRO 6000 Blackwell GPU.
You may need to adjust the number of environments to fit your VRAM if you are using a different GPU.
Note
Expected Data Generation Success Rate and Time
Data generation success rate: ~40% for both state and visuomotor
Data generation time: ~15 mins for state, ~1 hour for visuomotor
Numbers are based on using an RTX PRO 6000 Blackwell GPU with the provided commands.
Step 3: Policy Training#
Install Robomimic#
In this step, we will train a Behavior Cloning (BC) RNN agent using Robomimic to demonstrate a policy for the cube stacking task using the synthetic data generated in the previous step.
Install the Robomimic framework using the following command:
# install the dependencies
sudo apt install cmake build-essential
# install python module (for robomimic)
./isaaclab.sh -i robomimic
Train an Agent#
Using the Isaac Lab Mimic generated data we can now train a state-based BC RNN agent for
IsaacContrib-Stack-Cube-Franka-IK-Rel, or a visuomotor BC RNN agent for
IsaacContrib-Stack-Cube-Franka-IK-Rel-Visuomotor:
uv run python scripts/imitation_learning/robomimic/train.py \
--task IsaacContrib-Stack-Cube-Franka-IK-Rel \
--algo bc \
--dataset ./datasets/generated_dataset.hdf5
uv run python scripts/imitation_learning/robomimic/train.py \
--task IsaacContrib-Stack-Cube-Franka-IK-Rel-Visuomotor \
--algo bc \
--dataset ./datasets/generated_dataset.hdf5
Important
The trained models and logs are saved to IsaacLab/logs/robomimic.
Visualize the Results#
Run the trained policy to visualize the results:
uv run python scripts/imitation_learning/robomimic/play.py \
--task IsaacContrib-Stack-Cube-Franka-IK-Rel \
--viz kit \
--num_rollouts 50 \
--checkpoint /PATH/TO/desired_model_checkpoint.pth
uv run python scripts/imitation_learning/robomimic/play.py \
--task IsaacContrib-Stack-Cube-Franka-IK-Rel-Visuomotor \
--viz kit \
--num_rollouts 50 \
--checkpoint /PATH/TO/desired_model_checkpoint.pth
When evaluating policy performance, it is common for different training epochs to yield different results. If you don’t see the expected performance, always test policies from various epochs (not just the final checkpoint) to find the best-performing model. Model performance can vary substantially across training, and the final epoch is not always optimal.
Robomimic BC RNN policy performing the cube stacking task#
Note
Expected Policy Training Time and Success Rate
BC RNN training time: ~30 mins for state (1000 epochs), ~6 hours for visuomotor (600 epochs)
BC RNN policy success rate: ~40-60% for both state and visuomotor
Recommendation: Evaluate checkpoints from various epochs throughout training to identify the best-performing model
Numbers are based on using an RTX PRO 6000 Blackwell GPU with the provided commands.
You have now completed the introductory tutorial on synthetic data generation and policy training with Isaac Lab Mimic. In the sections below, you can explore examples with other robot embodiments (e.g. humanoids) and how to create your own Isaac Lab Mimic compatible environments.
Humanoid Examples#
For examples of data generation and policy training with humanoid robots (GR-1, G1), see the page: Examples: Data Generation and Imitation Learning for Humanoids.
Creating Your Own Isaac Lab Mimic Compatible Environments#
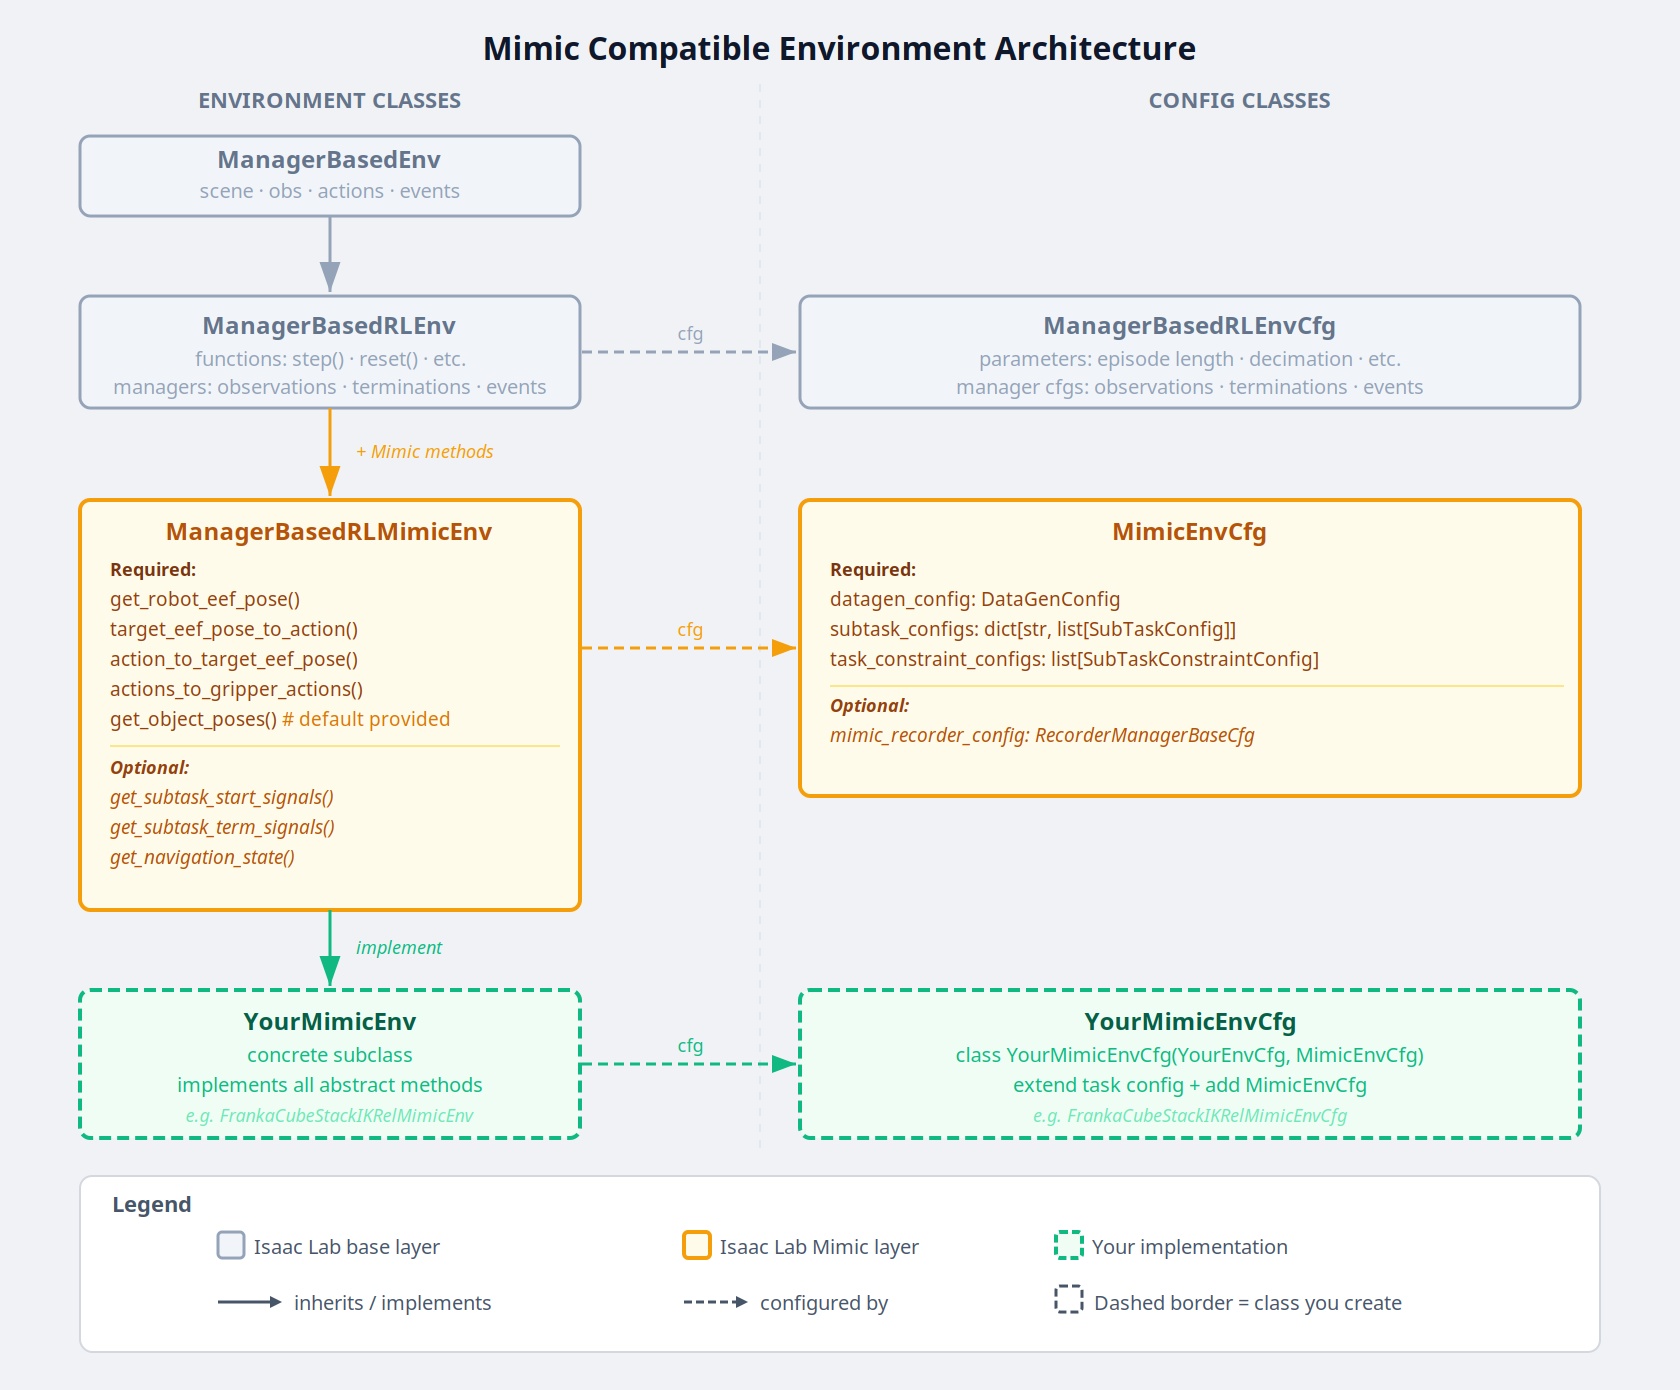
Mimic compatible environment class and config hierarchy#
How it works#
Isaac Lab Mimic works by splitting the input demonstrations into subtasks. Subtasks are user-defined segments in the demonstrations that are common to all demonstrations. Examples for subtasks are “grasp an object”, “move end effector to some pre-defined position”, “release object” etc.. Note that most subtasks are defined with respect to some object that the robot interacts with.
Subtasks need to be defined, and then annotated for each input demonstration. Annotation can either happen algorithmically by defining heuristics for subtask detection, as was done in the example above, or it can be done manually.
With subtasks defined and annotated, Isaac Lab Mimic utilizes a small number of helper methods to then transform the subtask segments, and generate new demonstrations by stitching them together to match the new task at hand.
For each thusly generated candidate demonstration, Isaac Lab Mimic uses a boolean success criteria to determine whether the demonstration succeeded in performing the task, and if so, add it to the output dataset. Success rate of candidate demonstrations can be as high as 70% in simple cases, and as low as <1%, depending on the difficulty of the task, and the complexity of the robot itself.
Configuration and subtask definition#
Subtasks, among other configuration settings for Isaac Lab Mimic, are defined in a Mimic compatible environment configuration class that is created by extending the existing environment config with additional Mimic required parameters.
All Mimic required config parameters are specified in the MimicEnvCfg class.
The config class FrankaCubeStackIKRelMimicEnvCfg serves as an example of creating a Mimic compatible environment config class for the Franka stacking task that was used in the examples above.
The DataGenConfig member contains various parameters that influence how data is generated. It is initially sufficient to just set the name parameter, and revise the rest later.
Subtasks are a list of SubTaskConfig objects, of which the most important members are:
object_refis the object that is being interacted with. This will be used to adjust motions relative to this object during data generation. Can beNoneif the current subtask does not involve any object.subtask_term_signalis the ID of the signal indicating whether the subtask is active or not.
For multi end-effector environments, subtask ordering between end-effectors can be enforced by specifying subtask constraints. These constraints are defined in the SubTaskConstraintConfig class.
Subtask annotation#
Once the subtasks are defined, they need to be annotated in the source data. There are two methods to annotate source demonstrations for subtask boundaries: Manual annotation or using heuristics.
It is often easiest to perform manual annotations, since the number of input demonstrations is usually very small. To perform manual annotations, use the annotate_demos.py script without the --auto flag. Then press B to pause, N to continue, and S to annotate a subtask boundary.
For more accurate boundaries, or to speed up repeated processing of a given task for experiments, heuristics can be implemented to perform the same task. Heuristics are observations in the environment. An example how to add subtask terms can be found in source/isaaclab_tasks/isaaclab_tasks/contrib/stack/stack_env_cfg.py, where they are added as an observation group called SubtaskCfg. This example is using prebuilt heuristics, but custom heuristics are easily implemented.
Helpers for demonstration generation#
Helpers needed for Isaac Lab Mimic are defined in the environment. All tasks that are to be used with Isaac Lab Mimic are derived from the ManagerBasedRLMimicEnv base class, and must implement the following functions:
get_robot_eef_pose: Returns the current robot end effector pose in the same frame as used by the robot end effector controller.target_eef_pose_to_action: Takes a target pose and a gripper action for the end effector controller and returns an action which achieves the target pose.action_to_target_eef_pose: Takes an action and returns a target pose for the end effector controller.actions_to_gripper_actions: Takes a sequence of actions and returns the gripper actuation part of the actions.get_object_poses: Returns the pose of each object in the scene that is used for data generation.get_subtask_term_signals: Returns a dictionary of binary flags for each subtask in a task. The flag of true is set when the subtask has been completed and false otherwise.
The class FrankaCubeStackIKRelMimicEnv shows an example of creating a Mimic compatible environment from an existing Isaac Lab environment.
Registering the environment#
Once both Mimic compatible environment and environment config classes have been created, a new Mimic compatible environment can be registered using gym.register. For the Franka stacking task in the examples above, the Mimic environment is registered as Isaac-Stack-Cube-Franka-IK-Rel-Mimic-v0.
The registered environment is now ready to be used with Isaac Lab Mimic.
Tips for Successful Data Generation with Isaac Lab Mimic#
Splitting subtasks#
A general rule of thumb is to split the task into as few subtasks as possible, while still being able to complete the task. Isaac Lab Mimic data generation uses linear interpolation to bridge and stitch together subtask segments. More subtasks result in more stitching of trajectories which can result in less smooth motions and more failed demonstrations. For this reason, it is often best to annoatate subtask boundaries where the robot’s motion is unlikely to collide with other objects.
For example, in the scenario below, there is a subtask partition after the robot’s left arm grasps the object. On the left, the subtask annotation is marked immediately after the grasp, while on the right, the annotation is marked after the robot has grasped and lifted the object. In the left case, the interpolation causes the robot’s left arm to collide with the table and it’s motion lags while on the right the motion is continuous and smooth.
Motion lag/collision caused by poor subtask splitting (left)
Selecting number of interpolation steps#
The number of interpolation steps between subtask segments can be specified in the SubTaskConfig class. Once transformed, the subtask segments don’t start/end at the same spot, thus to create a continuous motion, Isaac Lab Mimic
will apply linear interpolation between the last point of the previous subtask and the first point of the next subtask.
The number of interpolation steps can be tuned to control the smoothness of the generated demonstrations during this stitching process. The appropriate number of interpolation steps depends on the speed of the robot and the complexity of the task. A complex task with a large object reset distribution will have larger gaps between subtask segments and require more interpolation steps to create a smooth motion. Alternatively, a task with small gaps between subtask segments should use a small number of interpolation steps to avoid unnecessary motion lag caused by too many steps.
An example of how the number of interpolation steps can affect the generated demonstrations is shown below. In the example, an interpolation is applied to the right arm of the robot to bridge the gap between the left arm’s grasp and the right arm’s placement. With 0 steps, the right arm exhibits a jerky jump in motion while with 20 steps, the motion is laggy. With 5 steps, the motion is smooth and natural.
Left: 0 steps. Middle: 5 steps. Right: 20 steps.
Common Pitfalls when Generating Data#
Demonstrations are too long:
Longer time horizon is harder to learn for a policy
Start close to the first object and minimize motions
Demonstrations are not smooth:
Irregular motion is hard for policy to decipher
Better teleop devices result in better data (i.e. SpaceMouse is better than Keyboard)
Pauses in demonstrations:
Pauses are difficult to learn
Keep the human motions smooth and fluid
Excessive number of subtasks:
Minimize the number of defined subtasks for completing a given task
Less subtacks results in less stitching of trajectories, yielding higher data generation success rate
Lack of action noise:
Action noise makes policies more robust
Recording cropped too tight:
If recording stops on the frame the success term triggers, it may not re-trigger during replay
Allow for some buffer at the end of recording
Non-deterministic replay:
Physics in IsaacLab are not deterministically reproducible when using
env.resetso demonstrations may fail on replayCollect more human demos than needed, use the ones that succeed during annotation
All data in Isaac Lab Mimic generated HDF5 file represent a successful demo and can be used for training (even if non-determinism causes failure when replayed)
Glossary#
- Isaac Lab Mimic (Mimic)#
Tool for generating spatially new robot demonstrations from a small number of human demonstrations.
- Subtask#
A contiguous segment of a human demonstration where the robot’s end-effector action is dictated by a single rigid object.
- Annotated Dataset#
An HDF5 dataset with human demonstrations marked with subtask completion boundaries.
- IK#
Inverse kinematics.
- FK#
Forward kinematics.
- Task Space Action#
A robot action defined in the robot’s end-effector space given by spatial translation (XYZ) and orientation (quaternion or euler).
- State-based Policy#
A policy that takes state vectors as input and outputs a robot action.
- Visuomotor Policy:#
A policy that takes camera images as input and outputs a robot action.