Teleoperation Data Collection#
This workflow covers collecting demonstrations for the G1 loco-manipulation task using Meta Quest 3 supported by Nvidia IsaacTeleop.
Note
For supported IsaacTeleop hardware devices, see Supported Input Devices. Before starting teleoperation, also review the IsaacTeleop system requirements.
Important
A stable network connection meeting the CloudXR network requirements is required before starting the steps below.
Step 1: Start the CloudXR Runtime#
On the host machine, configure the firewall to allow CloudXR traffic. The required ports depend on the client type.
sudo ufw allow 49100/tcp   # Signaling
sudo ufw allow 47998/udp   # Media stream
sudo ufw allow 48322/tcp   # Proxy (HTTPS mode only)
Start the CloudXR runtime from the Arena Docker container:
./docker/run_docker.sh
python -m isaacteleop.cloudxr
Attention
The first run will prompt users to accept the NVIDIA CloudXR License Agreement.
To accept the EULA, reply Yes when prompted with the below message:
NVIDIA CloudXR EULA must be accepted to run. View: https://github.com/NVIDIA/IsaacTeleop/blob/main/deps/cloudxr/CLOUDXR_LICENSE

Accept NVIDIA CloudXR EULA? [y/N]: Yes
Step 2: Start Arena Teleop#
In another terminal, start the Arena Docker container:
./docker/run_docker.sh
Run the following command to activate IsaacTeleop CloudXR environment settings:
source ~/.cloudxr/run/cloudxr.env
Important
Order matters. In the terminal where you will run Arena,
source ~/.cloudxr/run/cloudxr.envafter the CloudXR runtime from Step 1 is already running, and before you start the Arena app. The Arena app must inherit the IsaacTeleop CloudXR environment variables.Run the teleop script:
python isaaclab_arena/scripts/imitation_learning/teleop.py \
  --viz kit \
  --device cpu \
  galileo_g1_locomanip_pick_and_place \
  --teleop_device openxr
In the running application, start the session from the XR tab in the application window.
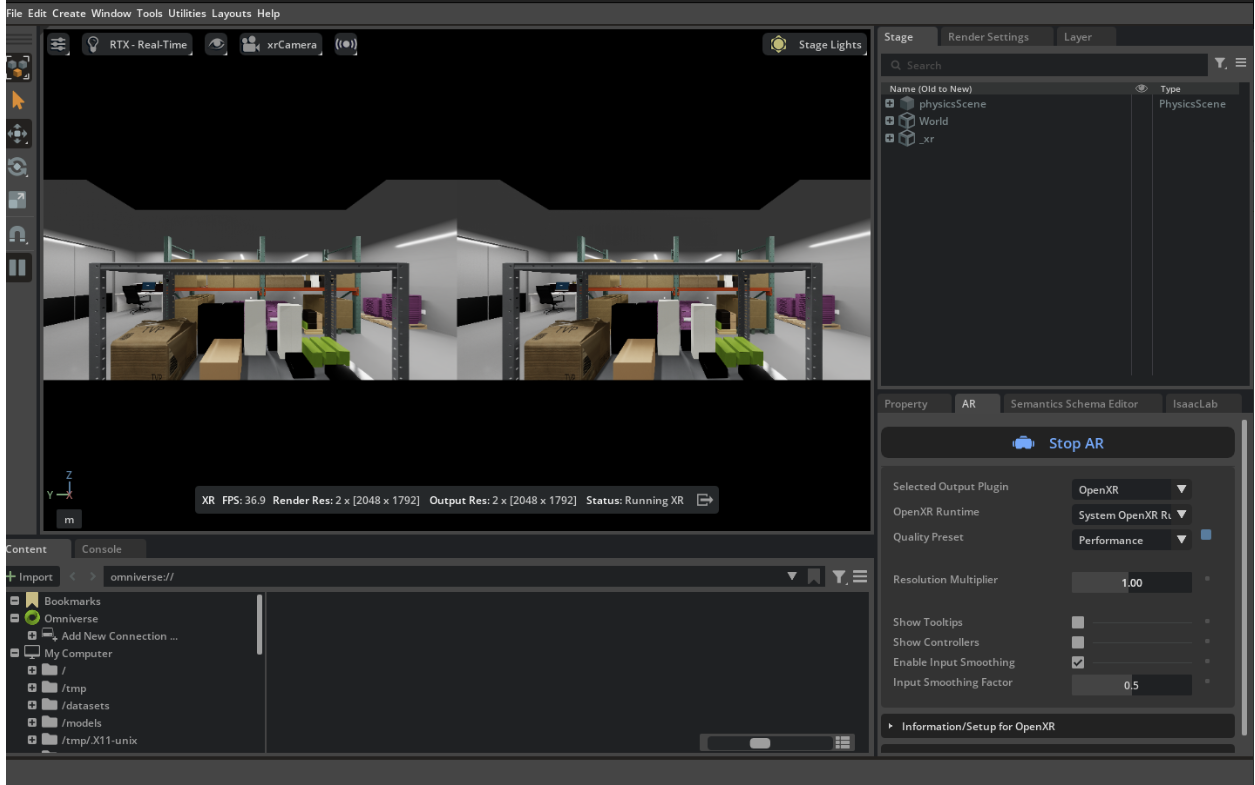
Arena teleop session with XR running. Stereoscopic view (left) and OpenXR settings in the XR tab (right).#
Step 3: Connect from Meta Quest 3#
For detail instructions please refer to Connect an XR Device:
Open the browser on your headset and navigate to https://nvidia.github.io/IsaacTeleop/client.
Enter the IP address of your Isaac Lab host machine in the Server IP field.
Click the Click https://<ip>:48322/ to accept cert link that appears on the page. Accept the certificate in the new page that opens, then navigate back to the CloudXR.js client page.
Click Connect to begin teleoperation.
Teleoperation Controls:
Left joystick: Move the body forward/backward/left/right.
Right joystick: Squat (down), rotate torso (left/right).
Controllers: Move end-effector (EE) targets for the arms.
Note
If the simulation runs at too low FPS and makes the teleoperation feel laggy, you can try to reduce the XR resolution from the XR tab / Advanced Settings / Render Resolution.
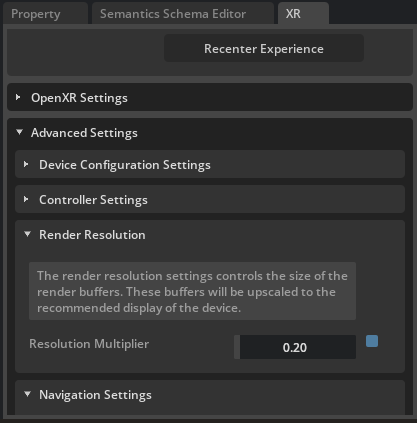
Reducing render resolution from 1 (default) to 0.2.#
Once you have verified the teleoperation pipeline, exit VR from the Quest 3 headset, and stop the Arena teleop app.
Step 4: Record with Quest 3#
Note
Run the following command to activate IsaacTeleop CloudXR environment settings again if you are starting the recording app from a different terminal.
source ~/.cloudxr/run/cloudxr.env
Run the recording script from the Arena container:
export DATASET_DIR=/datasets/isaaclab_arena/locomanipulation_tutorial
mkdir -p $DATASET_DIR

# Record demonstrations with OpenXR teleop
python isaaclab_arena/scripts/imitation_learning/record_demos.py \
  --viz kit \
  --device cpu \
  --dataset_file $DATASET_DIR/arena_g1_loco_manipulation_dataset_recorded.hdf5 \
  --num_demos 10 \
  --num_success_steps 2 \
  galileo_g1_locomanip_pick_and_place \
  --teleop_device openxr
In the running application, start the session from the XR tab in the application window.
Follow Step 3 to connect the Quest 3 headset again.
Complete the task for each demo. Reset between demos. The script saves successful runs to the HDF5 file above.
Hint
Suggested sequence for the task:
Align your body with the robot.
Walk forward (left joystick forward).
Grab the box (controllers).
Walk backward (left joystick back).
Turn toward the bin (right joystick).
Walk forward to the bin.
Squat (right joystick down).
Place the box in the bin (controllers).
Warning
Known issue: the squat height does not reset correctly between demos. As a workaround, after each completed demo:
Use the right joystick (up) to stand the robot back up.
Use the control panel to Reset, then Play to start the next demo.
Hint
Collecting a large dataset across several sittings? Record one HDF5 per session by varying
--dataset_file, then concatenate the per-session files with
Step 4b: Merge Multiple Recording Sessions (Optional). The merge script is task-agnostic and works for every
Arena teleop workflow.
Step 5: Replay Recorded Demos (Optional)#
To replay the recorded demos:
# Replay from the recorded HDF5 dataset
python isaaclab_arena/scripts/imitation_learning/replay_demos.py \
  --viz kit \
  --device cpu \
  --dataset_file $DATASET_DIR/arena_g1_loco_manipulation_dataset_recorded.hdf5 \
  galileo_g1_locomanip_pick_and_place